
-min")
How Do You Repost On Instagram
Whether you are a total beginner or an experienced user who always wanted to know how do you repost on Instagram by using awesome graphics tools to bring out your best creativity, you have come to the right place.
LEARN WHY Wealthy Affiliate IS MY #1 RECOMMENDATION
Here is the comprehensive training I promised on how to create posts and reposts on Instagram using Canva.
More...
This training series "How Do You Repost on Instagram" will be in 2 parts:
- Part 1 will thoroughly demonstrate how to create simple Instagram posts, how to save posts in Instagram draft for later posting, and how to create post-worthy images in Canva.
- The next training Part 2 will teach you how to effectively Repost anything on Instagram like a Pro to attract a large amount of followers.
This Part 1 training series will be divided into the following lessons:
| There are affiliate links within this post. What this means is that if you decide to purchase anything through one of my links, I'll be rewarded with a small commission at absolutely no extra cost to you. This small commission helps me run and maintain my website. |

Introduction: What You Will Need to Get Started
Canva is a wonderful FREE and simple to use design tool that works perfectly with Instagram.
You will be working on your smartphone almost all of the time; this is the device you will be using almost exclusively to post on Instagram. The only time I use my computer is for preparing images in Canva, once they are ready in Canva from there I only use my smartphone.
Here are the first things you will need to do before we start this training:
Background: Posting, Saving Drafts, and Reposting Instagram Images

I make it a habit to post my own image(s) or repost at least one image with a personal caption on Instagram every day. This is a GREAT way to build a following and attract a multitude of Likes and New Followers to gain influence.
Reposting allows you to take other people’s images provided that you give them attribution, and to re-share their content on Instagram. It is where you capture images by other Instagram users from their Instagram feed or another Instagram user’s account, modify the image, add your own caption to it, save the image as a draft in Instagram for a later time or another day to post, or share the post immediately.
With hundreds of millions of images to repost and over 800 million + users on Instagram (only 2nd to Facebook for social media), you will never run out of material to post! If you are like me and post on Instagram, you will want to repost some of your favorite relevant images as part of your daily activity on Instagram.
By relevant, I mean images that relate to your niche i.e., as an interior designer I love posting great images by other interior designers, architecture, inspiring quotes, and some of my favorite images I find either while I am walking around the city, or reposting something beautiful or intriguing I find scrolling through the Instagram feed.
I also love to post FUN images relevant to hashtags on a trending day i.e., #ThrowbackThursday, #MotivationMonday, #TuesdayThoughts, etc. For more information on these, read my post by clicking the link below:
Well that’s some important background information for what we will be covering on how do you repost on Instagram.

Awesome! Now let’s get started with the training.
When you're ready, continue on to Lesson 1.

Lesson 1: Creating Post-Worthy Images in Canva
*Note: This training assumes you will be able to setup and create your Instagram and Canva profiles and usernames and passwords.
Instagram is all about the images, andby default all the images you will be posting on Instagram are square with a pixel size of 1080 x 1080.
This first 3 steps of the training "Using Canva stock images" is essentially a repeat of the steps I included from my post “Instagram Made Simple Using Canva.” You can re-read the post here:
Instagram Made Simple Using Canva
Steps 4-7 of the training "Using Your OWN Images" shows how to modify your OWN images in Canva, and then download them to your computer. You then save these from your computer to your smartphone, as all posting on Instagram is only done using your smartphone.
Here from Steps 1-7 is the only time I use my desktop (or laptop) computer, to create my images in Canva. However, you can create the same images using the Canva app on your smartphone, but I prefer using Canva on my desktop to create images as it is much quicker and easier to me.
The final Steps 8-12 "Downloading Images Using the Canva Smartphone App" demonstrate how to download all of your images from Canva using the Canva app on your smartphone once you've completed Steps 1-7. This is the EASIEST way to download your images.
Using Canva Stock Images:
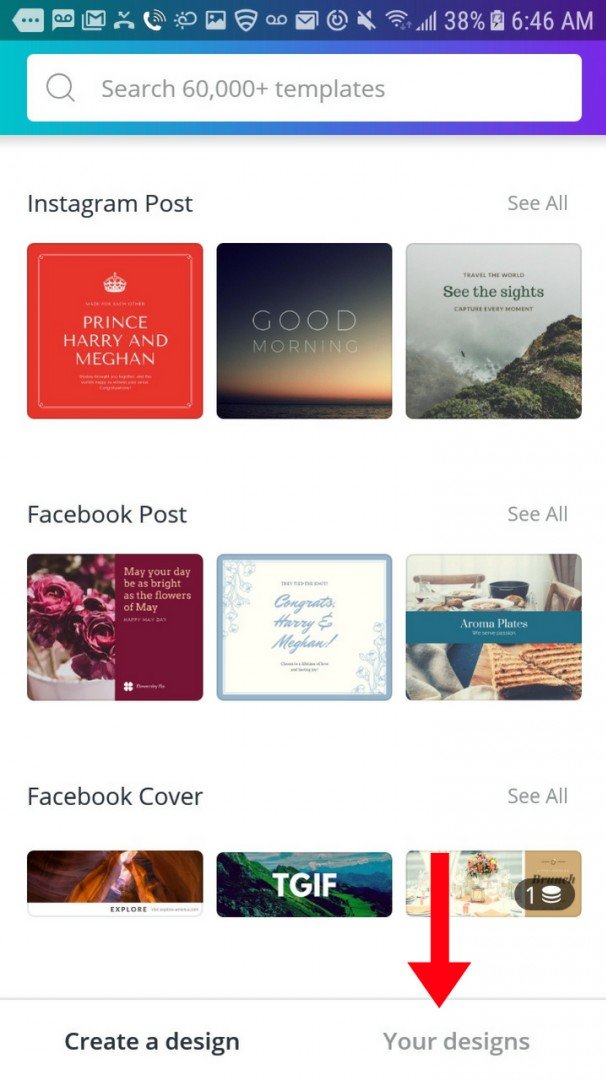
1. Once you have created a username and password and have logged into Canva, go to the top of the main page “Create a Design” and to the far right click “More.”
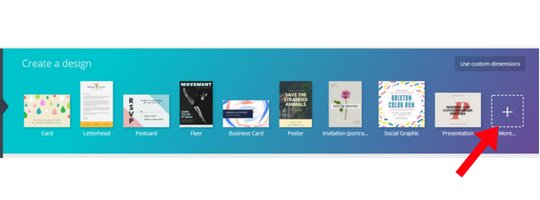
This will bring up 62 different templates, 7 of which are social media templates.

2. At the far right of “Social Media Posts”, click “Instagram Posts”. This is where you “drag and drop” your image which is set at the Instagram default size of 1080 x 1080.
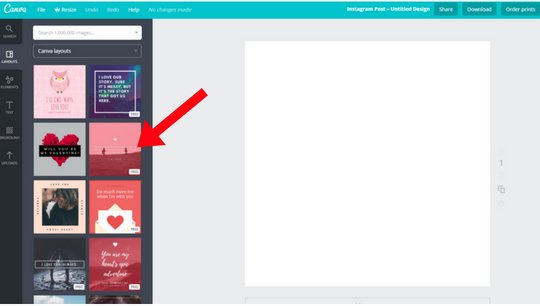
3. You can select one of the default images provided from Canva in the far left column (see below)

Using Your OWN Image
However, the majority of the time I use my OWN images saved from my computeror another drive, and then I will modify each of these images in Canva before posting to Instagram.
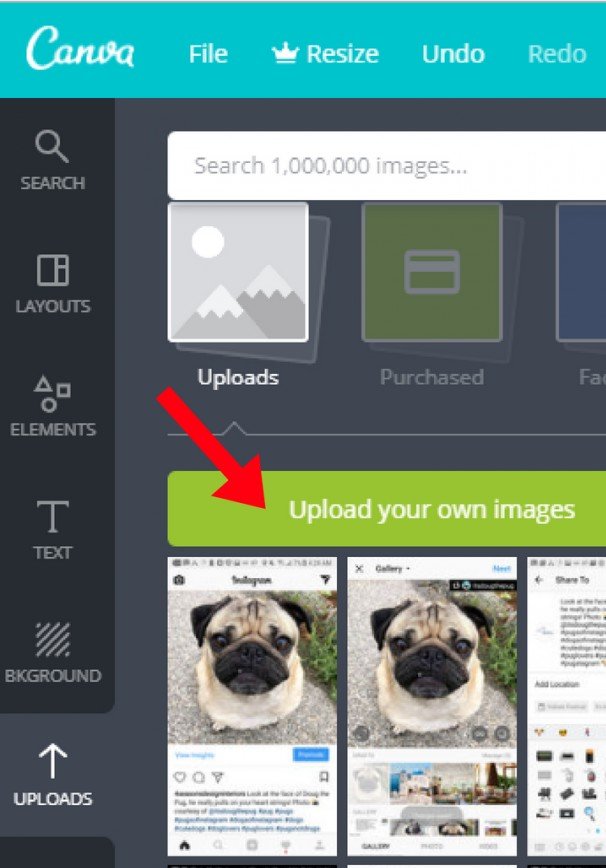
4. From the upper left column in Canva, select "Uploads",
Then upload one of your own images from your computer or from another source drive by clicking "Upload your own images".
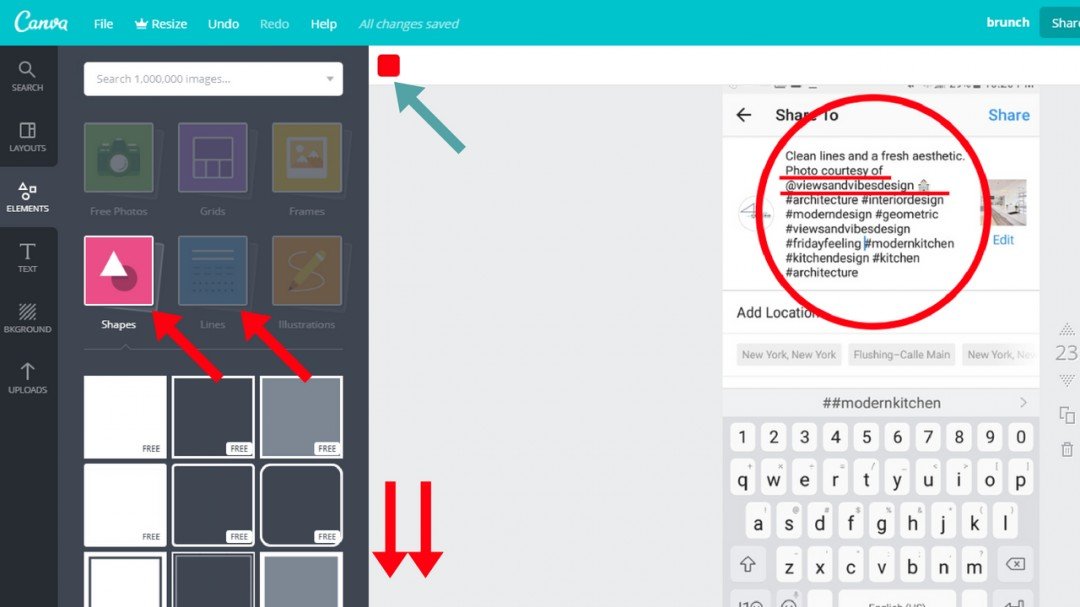
5. On the far left, choose from Elements, Text, Background, Layouts. Then use some of the FREE cool design tools i.e. Shapes, Lines, Illustrations, Free Photos, Icons, etc..
You can change Elements, Text, Background, Layouts to any hexagonal HTML colors.
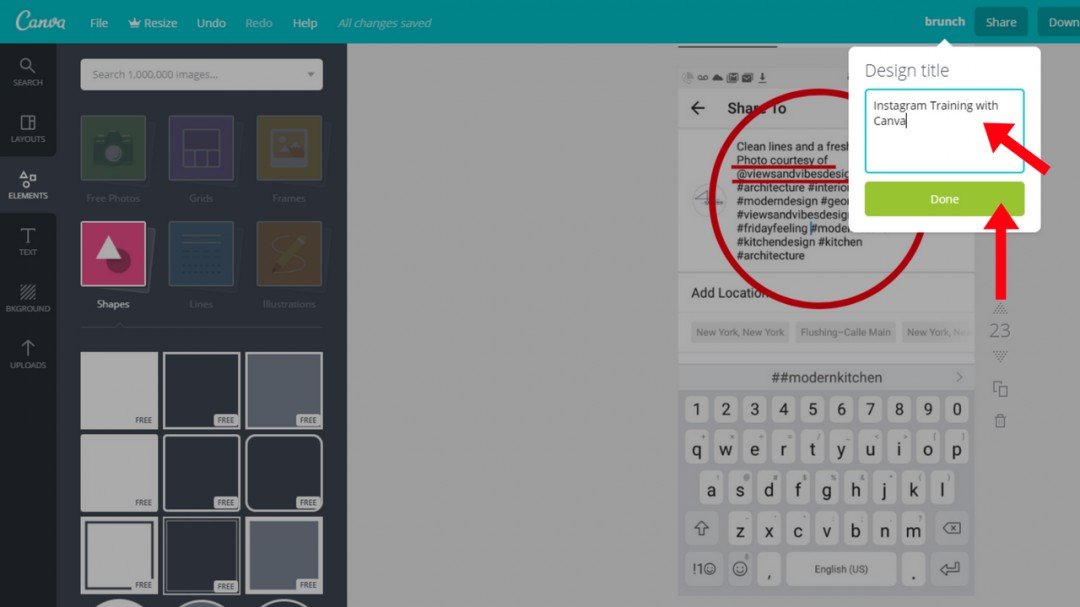
6. Rename the Design Title to your page. Click "Done."
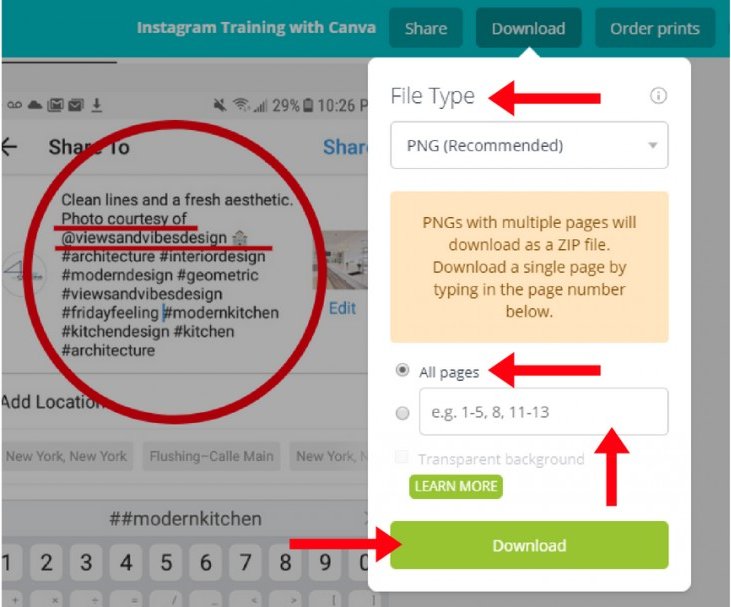
7. To download files to your computer, Click “Download” in the top tool bar, and a drop down menu will appear. Then select “File Type”.
Next select “All pages” or multiple pages of a page range e.g., 1-5, 5-8, etc.
The maximum limit for the FREE version is 30 pages per file. All files containing more than one page is downloaded as a zip file. Each “page” within a file can contain multiple images, text, graphics, or multiple icons.
Once all of your images are modified to satisfaction, click “Download”.
You will then need to transfer your Canva images from your desktop to your smartphone, as all Instagram posting is dome from your smartphone.
The way I do this is either by transferring my Canva images to my Google Drive then saving them in my image gallery of my phone. Or I will email myself these images and save them on my phone to my image gallery.
But there is a MUCH easier way.
Downloading Images Using the Canva Smartphone App
Alternatively,you can download the FREE Canva app to your smartphone and then download your images from the app. This is the easiest and most efficient way to download ALL your Canva images once you've created them on your desktop or laptop.
Here is how:
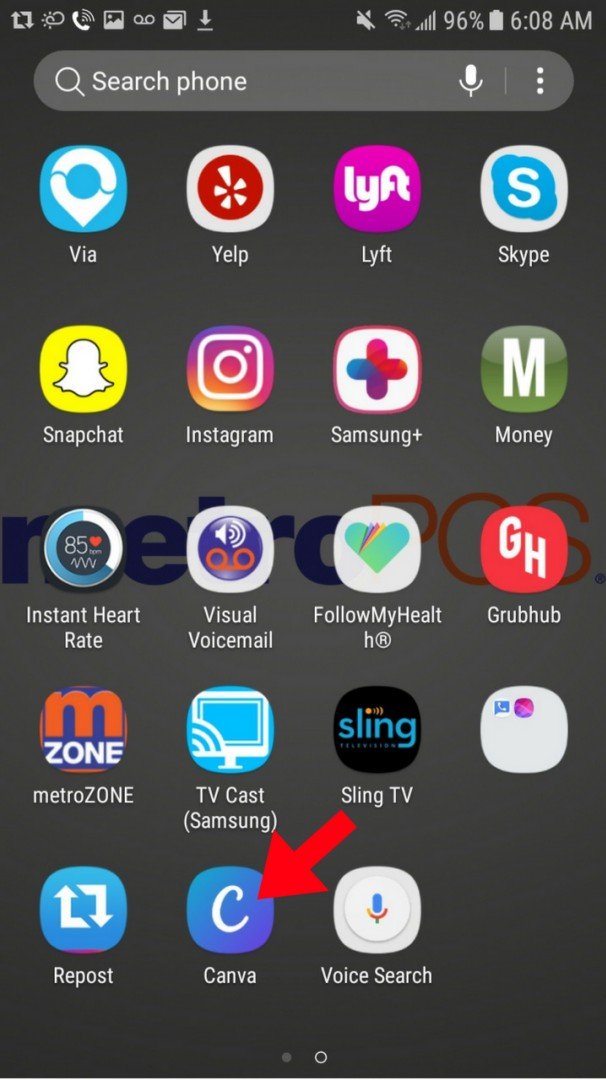
8. From your smartphone, select the Canva app icon.
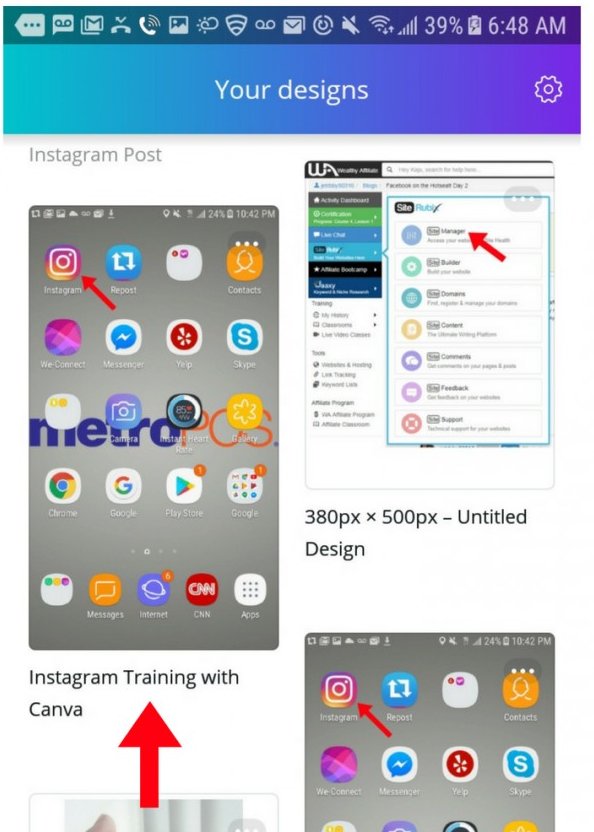
9. On the bottom right of the next screen, select “Your Designs”
10. On the next “Your Designs” screen, select the file you want to download (in this case my file was “Instagram Training with Canva”)
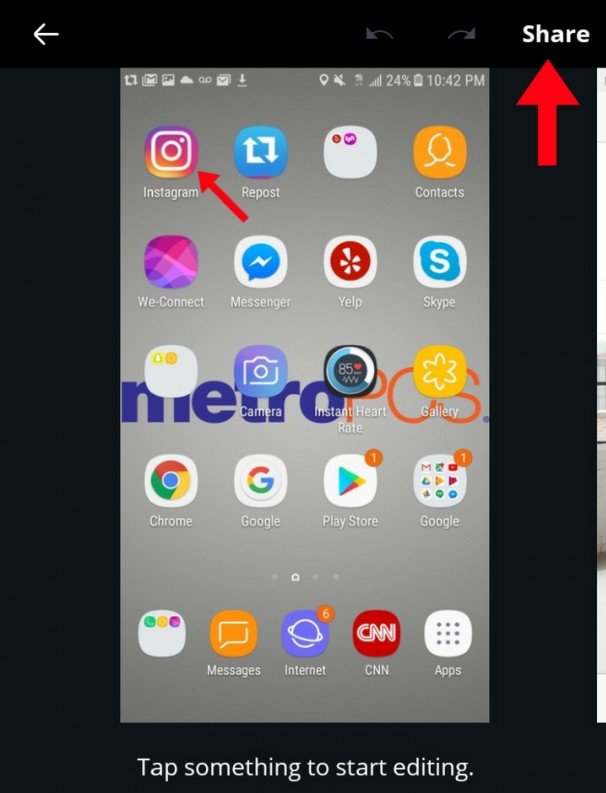
11. On the next screen, select “Share”. This will start the download process.
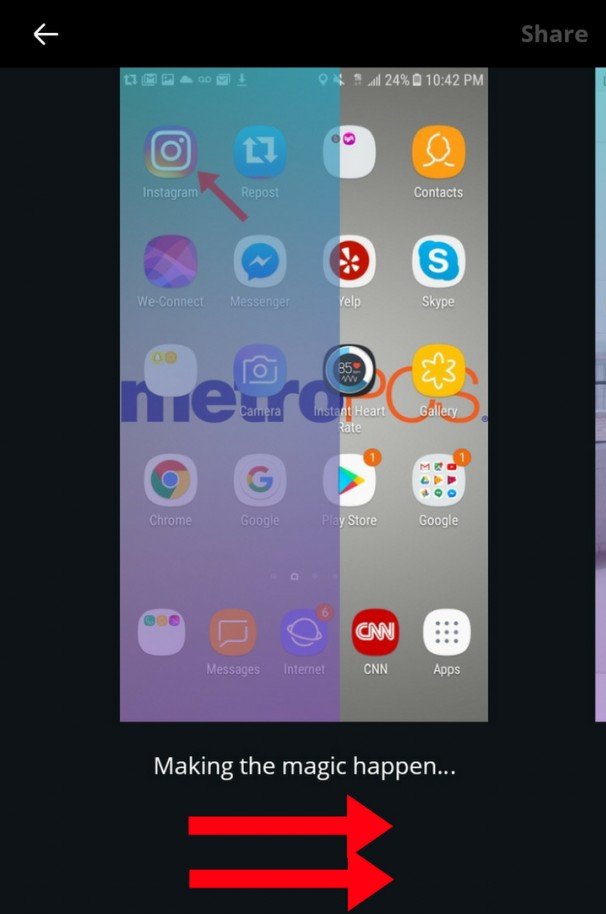
12. Downloading of the file (including all images) will be complete when the “shaded screen” completes its full movement across from left to right.
Okay, once you’ve completed these steps, go on to Lesson 2.

Lesson 2: How Do You Repost on Instagram Using Simple Posting
*Note: This training assumes you will be able to setup and create your Instagram and Canva profiles and usernames and passwords.
This lesson instructs you how to create simple Instagram posts, and how to save your work in Instagram draft to post at a later time or date.
LEARN WHY Wealthy Affiliate IS MY #1 RECOMMENDATION
Simple Instagram Posting
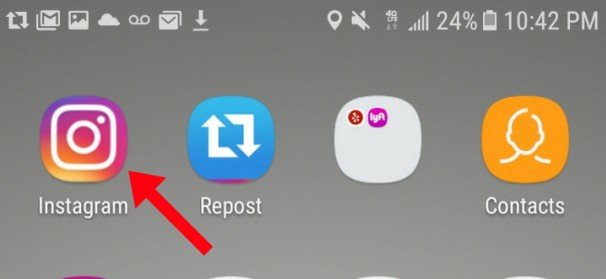
1. On your smartphone, select the “Instagram”icon.
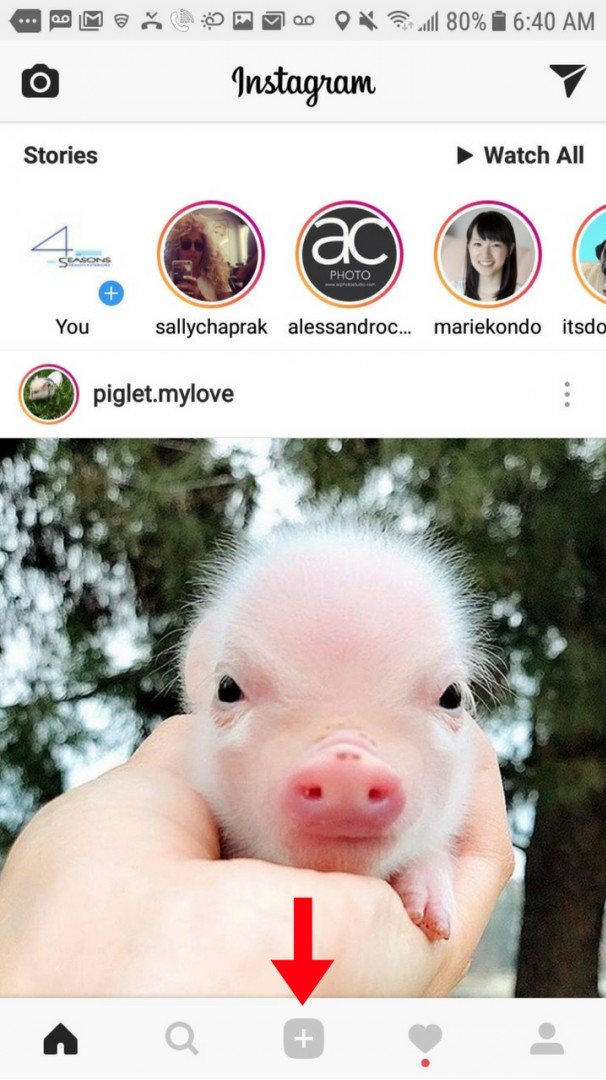
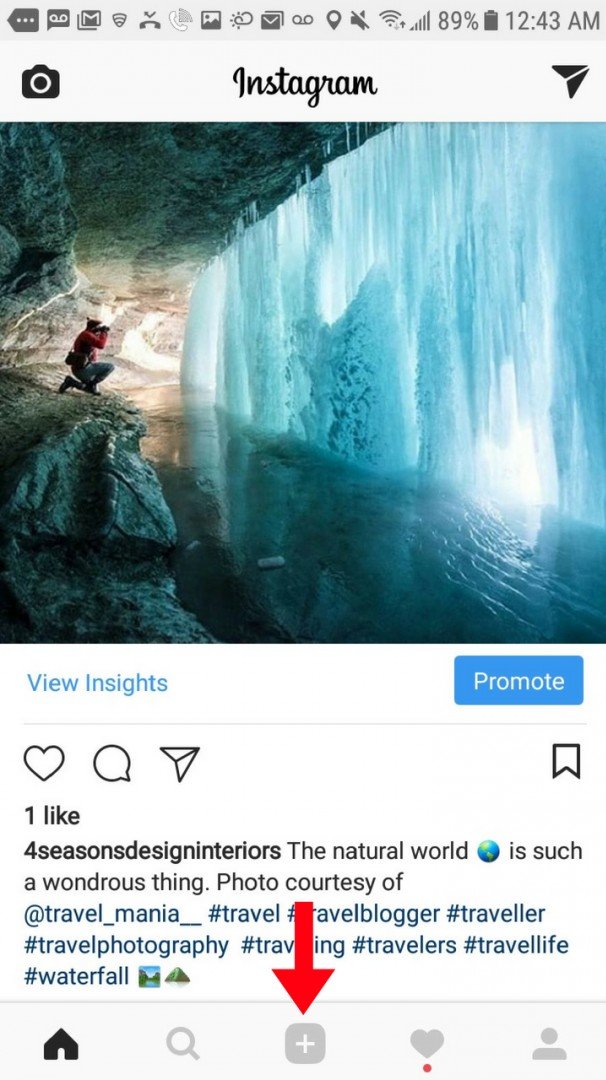
2. Once in Instagram, select the “+” sign on the bottom center of the page to go to your smartphone Image “Gallery”.
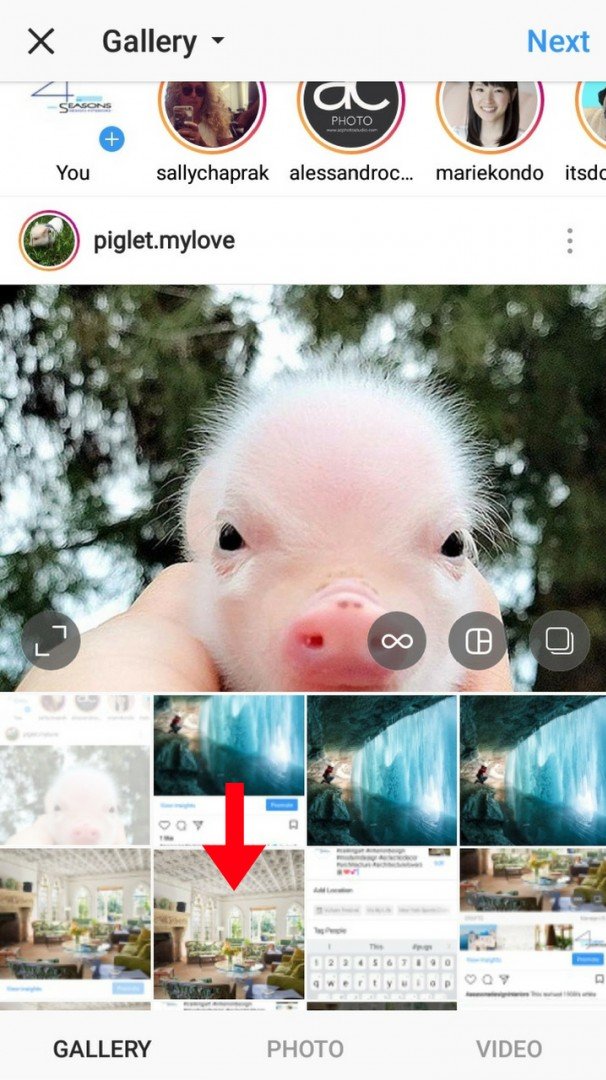
3. On the next screen in your “Gallery”, select the image you want to post on Instagram.
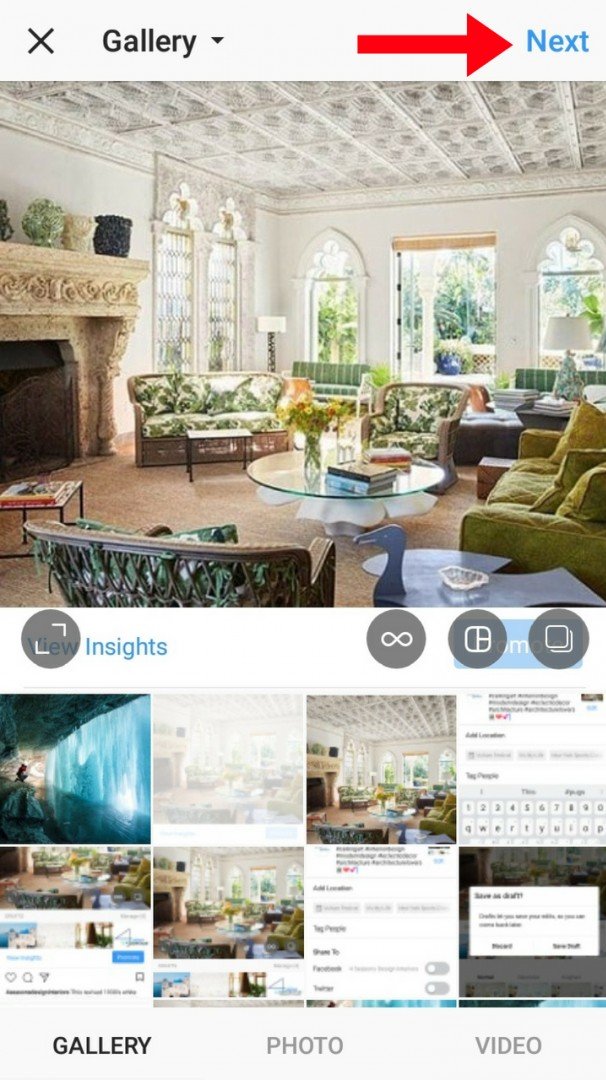
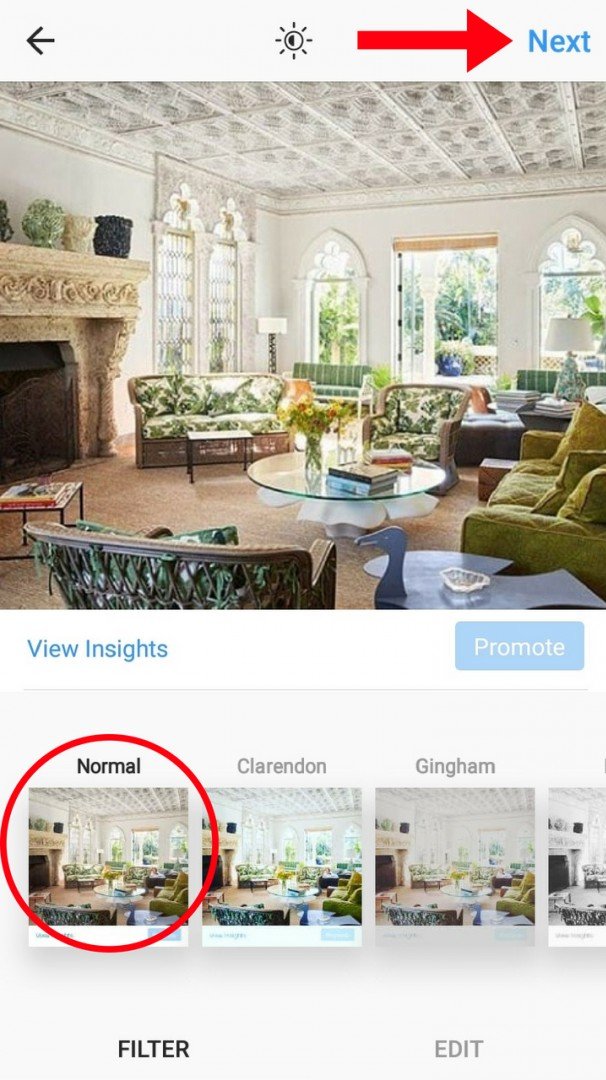
4. Once you are satisfied with the image, select “Next”.
5. On the next screen, you can change the Filter of the image. Almost all the time, I use the default which is “Normal”. If you are satisfied with the Filter, select “Next”.
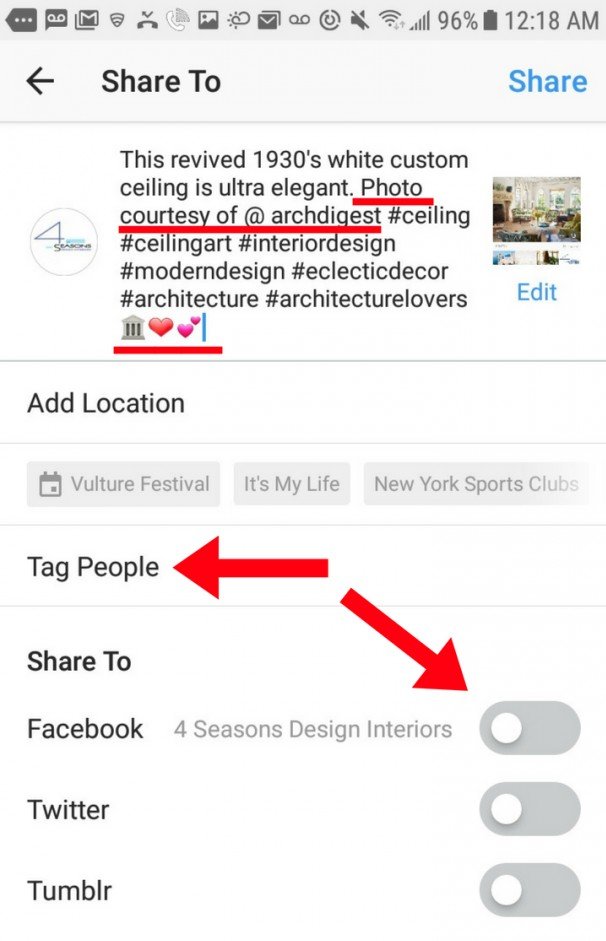
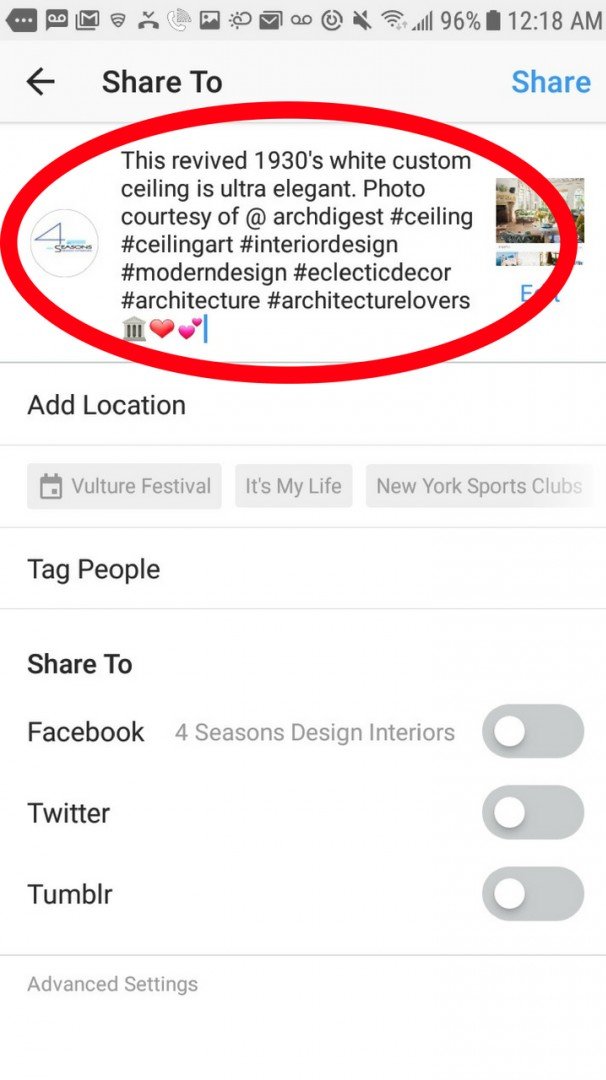
6. On the next screen, you will write a caption. Go ahead and write your caption.

7. When writing your caption, make sure you are posting one of your OWN images – or if you are posting someone else’s image MAKE SURE YOU GIVE THEM PROPER ATTRIBUTION by indicating in the caption “Photo courtesy of @Instagram account name”.
Include all relevant hashtags associated with the image you are posting. Add any emoticons you might like. (*Note: More details about hashtags coming in Part 2 of the training)
Also Tag any people and share on other Social Media if you choose to.
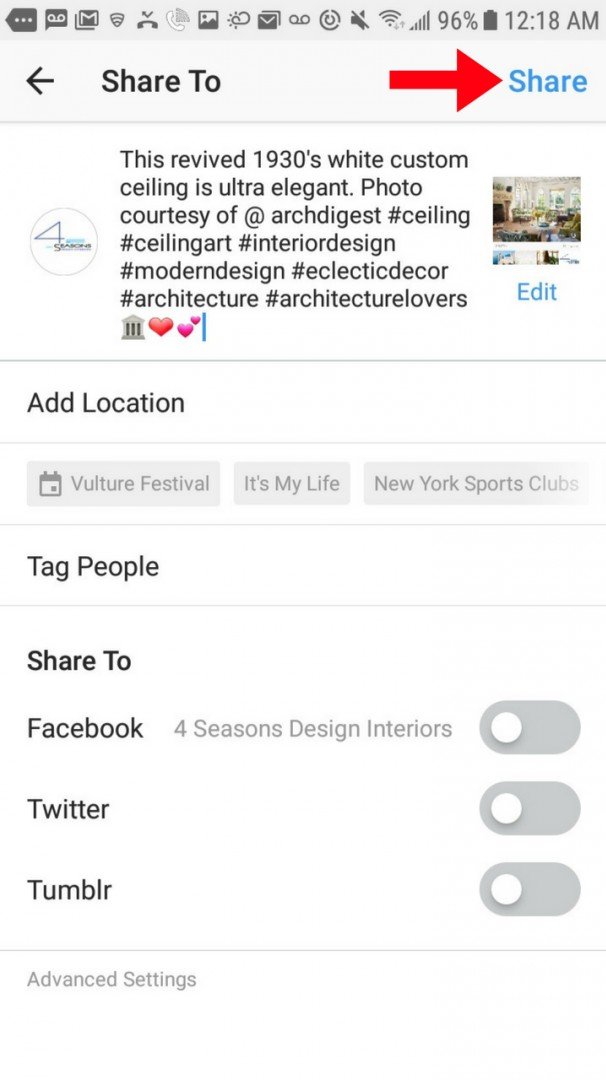
8. Click “Share” to Post.
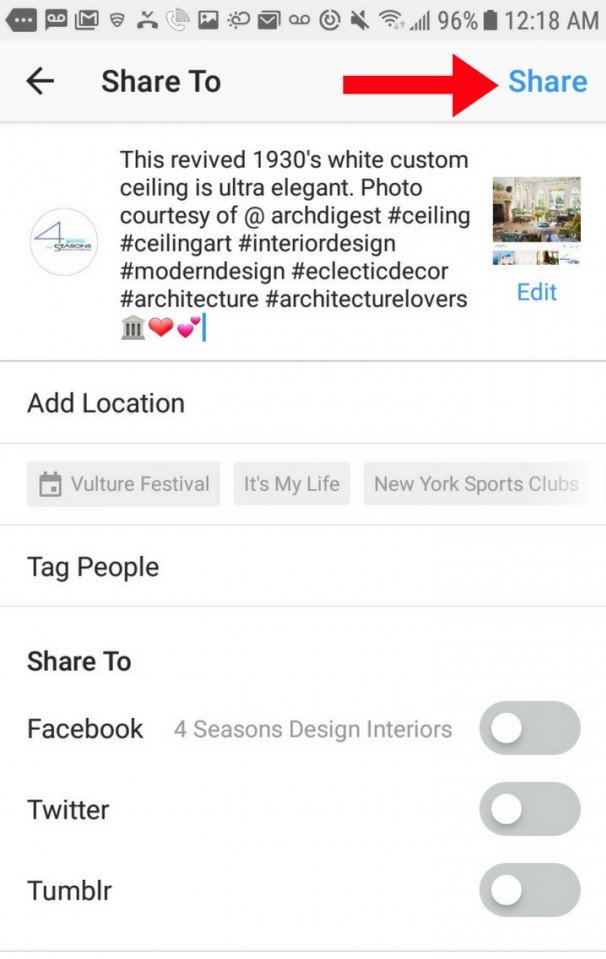
9. Check your completed post in Instagram. Looks Good!!

Excellent!
Once you’ve completed these steps, go on to Lesson 3.

Lesson 3: How Do You Repost on Instagram By Saving Drafts for Later Posting
Alternatively, instead of clicking “Share” to post immediately in Step 8 from Lesson 2, if you don’t want to post now you can save the post in Instagram “Drafts” to post at a later time.
I will call this first alternate Step 8a.
Then we will skip Step 9 (as it was included in Lesson 2) and re-continue with Steps 10-15.
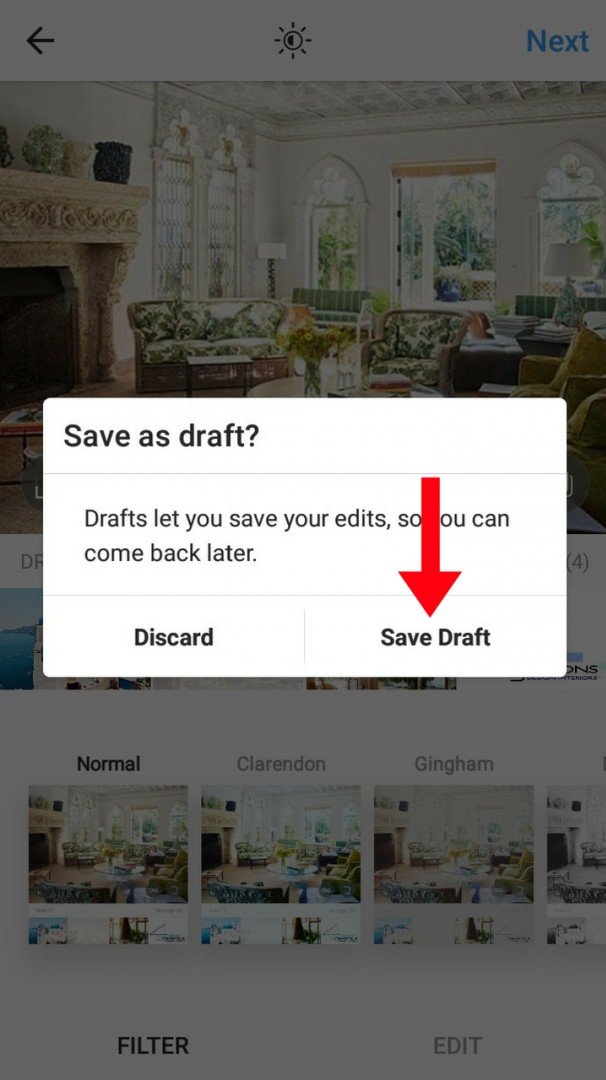
8a. After writing the caption in Step 7, click “Share To” 2x to go to “Save Draft”.
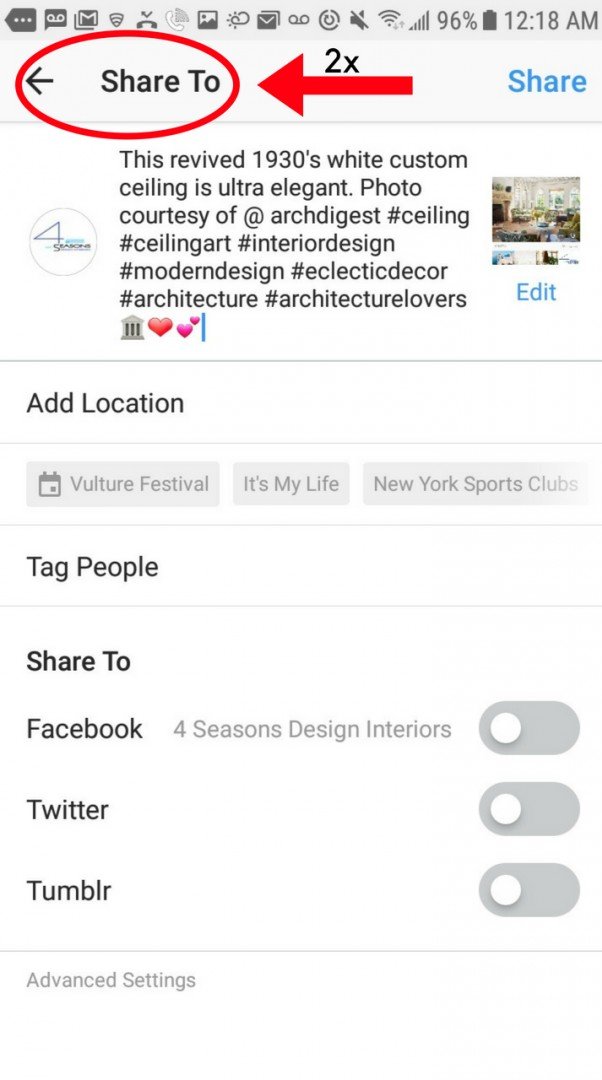
10. Select “Save Draft”
11. At a later time, go back to “Drafts by selecting the “+” sign.
12. Select the image from “Drafts” that want to post.
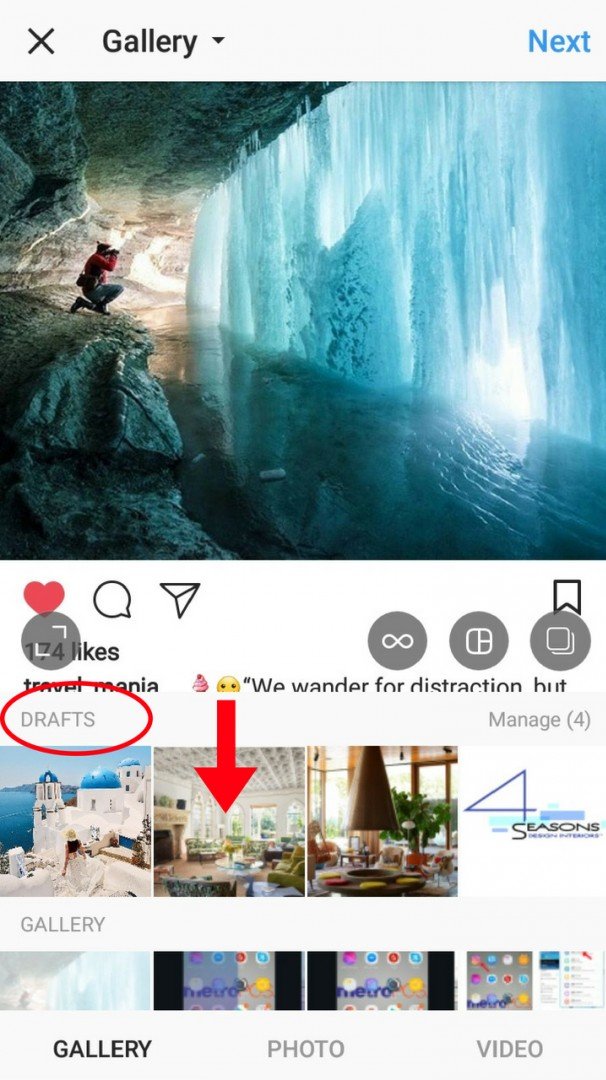
13. Once you are satisfied with the image, select “Next”.
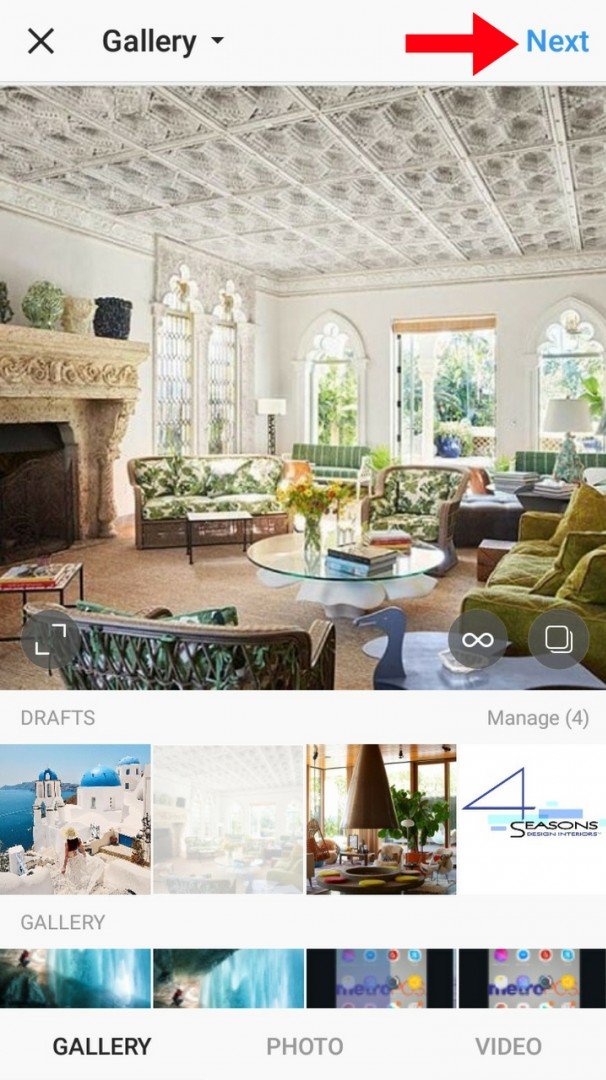
14. On the next screen, you will see the post with your completed caption.
15. If you are satisfied, click “Share” to Post.
Great, you have now completed Part 1 of “How Do You Repost On Instagram” and are well on your way to becoming a very active Instagram user!
Congratulations!!
Next we will be covering Part 2 of this training called “How Do You Repost On Instagram” where you will learn to post like an Instagram Pro every day of the week and attract a large group of followers!

Stay tuned as Part 2 of this training as it will be coming very shortly!
LEARN WHY Wealthy Affiliate IS MY #1 RECOMMENDATION
If you enjoyed this lesson and thought it was helpful, click “Like” below and as usual I would LOVE to hear your comments.